
Google Apps Script: Apps Scriptで古いgmailを自動削除する

フリーで利用できるgmail。使っている方、古いいらなくなったメール、そのままにしてたり定期的に手動で削除しているという方、多いんじゃないでしょうか?
googleアカウントをお持ちであれば、Apps Scriptという機能を使って自動的に削除することが可能です。その使い方をご紹介します。
“Old gmail automatically deleted. Code is this!”
If you use gmail, which is free to use, you probably have a lot of old emails that you no longer need, and you leave them as they are or delete them manually on a regular basis.
If you have a google account, you can use a function called Apps Script to automatically delete them. Here is how to use it.
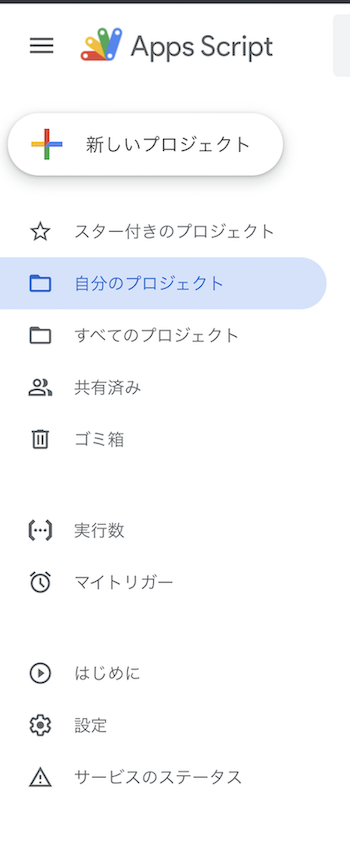
自分のApps Scriptのページを表示する
Chromeをお使いであれば、Google Apps Scriptを検索すれば-Script Gogleが出てくるはずですので
これを検索すれば自動的にに飛んでくれるはずです。
If you are using Chrome, if you search for Google Apps Script, you should be able to find -Script Gogle
If you search for this, it should automatically jump to.

自分のプロジェクトを作成
Apps Scriptのページが表示されていますので、左上の「新しいプロジェクト」をクリック。
するとプロジェクトの作成ページに移ります。
The Apps Script page is displayed, click on ‘New project’ in the top left-hand corner.
This will take you to the Create Project page.
ここで、
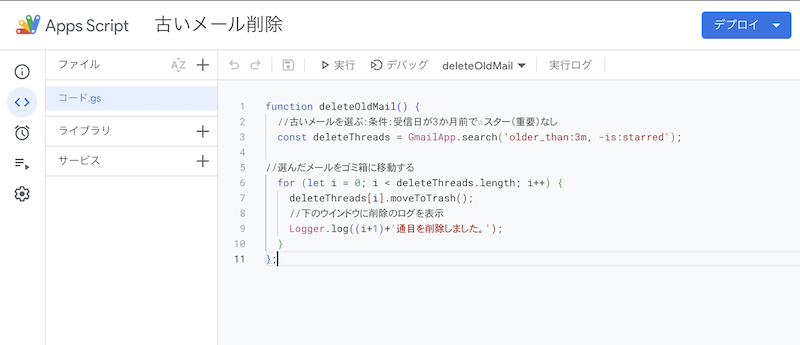
コード.gsにプログラムを書き込みます。
Here,Write the programme in code.gs.
gmail自動削除のコード
function deleteOldMail() {
//古いメールを選ぶ:受信日が3か月前でスター(重要)なし
const deleteThreads = GmailApp.search(‘older_than:6m, -is:starred’);
//選んだメールをゴミ箱に移動
for (let i = 0; i < deleteThreads.length; i++) {
deleteThreads[i].moveToTrash();
//削除メール(数)をログ表示
Logger.log((i+1)+’通目を削除しました。’);
}
};
作例では関数名をdeleteOldMailにして、3ヶ月経過後のメールを自動削除するようにしています。
6ヶ月でいい場合は6mに書き換えるなどしてください。
またログ表示は必要ない場合は、その部分だけを削除してもOKです。
In the example, the function name is deleteOldMail to automatically delete emails after 3 months.
If three months is sufficient, rewrite it to 6m, for example.
If you do not need the log display, you can delete that part only.
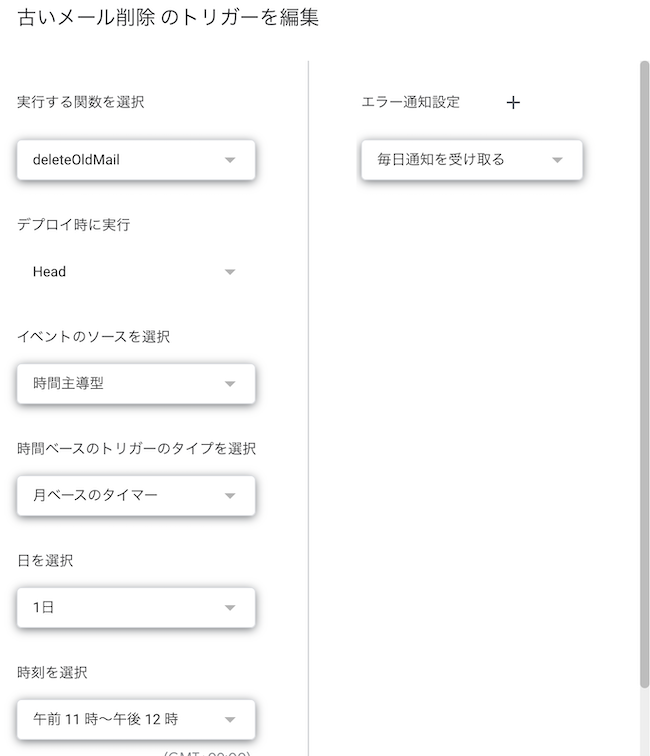
任意の名前をつけてトリガーを設定
プロジェクトに任意の名前をつけましょう。
わかりやすくmail自動削除とかでもいいと思います。
左の時計マークの部分をクリックしてトリガーを設定します。
実行する関数名から、イベントのタイプや日時を設定して、右下の「保存」をクリックします。
Give the project a name of your choice.
It could be something like mail auto-delete for clarity.
Click on the clock symbol on the left to set the trigger.
Set the event type, date and time from the function name to be executed and click ‘Save’ at the bottom right.

これで設定は完了です。
左上のiマークでプロジェクトの詳細(実行数など)が確認できます。
これで使いっぱなしでもメールがいっぱいになることはありません。
ぜひ、お試しあれ!
This completes the configuration.
You can check the project details (e.g. number of runs) with the i-mark in the top left-hand corner.
This will ensure that your email is never full, even if you leave it in use.
Try it out!
“Last but not least,Sorry for bad English.
Best regards,”
Share Me !